extend wireless in the house

there were some dead spots in my house.. so i was pondering buying a repeater or extender.. But then I recalled I had an older router packed away from when i replaced it with a newer model.. And i figured there must be a way to use it as the repeater/extender..
looked into it and as a repeater it could work (connects wirelessly to my other router).. or even as a ‘bridge’ (connects wired to my other router).
As luck would have it, i already had a wire going across my house to the area of the dead zone.. so i went with the bridge method.

I tried using the repeater function as well on the older router, but it expected only WEP security and specific channel to match the base router. Didn’t like that.

This site helped me with one thing i missed, which was connecting the wire to LAN instead of the internet slot:
https://networkingguides.com/connect-two-routers/

Pasted here in case link goes down..

Does Any of the Routers Have AP Mode?
Before we get started with how to use two routers and yet, have just one network, we first need to understand how the second router should be set up. Nowadays, you can purchase something called access points, or WAP, wireless access point. This is a product that is doing nothing other than to extend your WiFi connection.

A big difference between a router and an access point is that a router is doing so much more than an access point. A router will, for example, use DHCP to give devices an IP address in your network. A router can also do stuff like port forwarding and other types of networking stuff. An access point can’t do these things. If an access point gets a DHCP-request, it will forward that request to the router. What we need to do, is to make one of the routers more like an access point.

There are two ways to do this. If you have a router that is just a few years old, there is a high chance that the router has something called AP Mode. When a router is set to AP Mode, all things that are different between a router and an access point is turned off automatically. However, if you do not have this setting, you will need to turn off these things manually. To make a guide that is good for everyone, I have explained both ways down below, so do not worry if you don’t have this easy setting on your router.

But how do you know if you have AP mode on your router? Well, I wish I could tell you how you can see this on your router but unfortunately, there is no big red message on routers with AP mode. You can either:

Go to your router settings and start looking for something called AP Mode, most likely in administrator settings
Search your router model and “AP Mode” to see if you can find anything
Read the instructions guide for your router
If you have purchased a new router and found out that there is an AP Mode on that but not on the old router, do not switch. The newest router should always be the main router which is taking care of all the network stuff. This will ensure that you have new and fast hardware that takes care of network requests. New routers are often much more secure and since they are connected to the internet, that is a huge benefit.

For this guide, I am using my old Asus RT-N56 router as the secondary router while I am using my current main router, the Asus RT-AC68U, which you can find on Amazon, to be the master router.

Step 1: Configure the 2nd Router
Time to start configuring your router. I usually start with the 2nd one. Make sure to disconnect the power from both routers so that no one is connected to your network. We don’t want to configure the wrong router.

Take the 2nd router and make a factory reset on it to make sure there are no old settings on it. This is usually done by pressing a reset button on the back of the router and holding it in for a few seconds. Another way is to take a needle or similar and put it in a reset-hole on the back of the router. Please look in the manual or search Google to find out how to reset your router.

When your router has been reset, connect an ethernet cable to LAN 1 on the back of the router and the other end to the computer and turn the router on (if it isn’t already on from the reset). Open a web browser on the computer and go to the default IP address of the router. This is usually 192.168.0.1 or 192.168.1.1.

Since you have done a reset of the router, you will most likely have to go through a starting guide where you have to enter some information. When it’s time to choose the SSID and password, choose the name and the password that you want as your WiFi.

Since an IP address is unique, we also need to change the IP address of this 2nd router as the first one will likely have the same IP as the 2nd has right now. This would mean that you would have an IP conflict in your network and it would not work as you expect. In the router’s settings, change the IP to something else. My recommendation is to change the last number to a 2 instead of a 1, so it looks like any of these:

192.168.0.2
192.168.1.2
On my Asus N56U, I can find the IP settings under the LAN-category in the settings menu. Set the IP address and confirm and then let the router restart. You will also lose connection to the router since you have changed IP, so you will need to go to 192.168.0.2 or 192.168.1.2 in your browser to get back to the router settings.

The only thing left now is to turn off router-specific settings. Down below, I have explained how to do it with and without AP Mode, so choose the one that is suited for your router.

When Your Router Have AP Mode
If you have a router with AP Mode, you need to go to the settings for your router. Most likely, the IP address is now 192.168.0.2 or 192.168.1.2. On my Asus router, I can find the setting under Administration in the settings menu. Choose Access Point (AP) Mode and click Save. This will restart the router again, but this time it will turn off all the router-specific settings, which is what we want.

When the router has restarted, you can disconnect it from the power outlet as well as the computer as it’s time to configure the main router now, which is almost the same steps.

When Your Router Doesn’t Have AP Mode
If your router doesn’t support AP Mode, you will have to manually turn off router-specific settings. This is almost as easy as AP Mode. This is because settings on a router are based off one specific setting so if you turn it off, the router will stop with other settings as well.

This setting is DHCP. On my Asus router, I can find DHCP settings under LAN and then DHCP Server. Here, I can choose to turn off the DHCP server, which is exactly what we want. This will stop the router from giving out IP addresses to devices in your network and will also stop giving out the default gateway and DNS servers and such. So, turn off the DHCP server and apply the settings. Let the router restart.

When the router has restarted, you can disconnect it from the power outlet as well as the computer as it’s time to configure the main router now, which is almost the same steps.

Step 2: Configure the 1st Router
We have now done the hard part of configuring one router and it’s time to do the same on the first router that will act as the main router. There isn’t much that needs to be configured here at all, the starting guide will take you through most of the settings and we don’t need to change anything either.

If you have been using the router before and you already have it up and running, there is no need to factory reset it. Just make sure that the SSID and the password are the same on this router as it is on the 2nd router that we just configured. If it is, continue to step 2b.

If the router is not yet configured, plug-in power and connect it to your computer using an ethernet cable. Now, go to the default IP address of the router, which you have learned by now is either 192.168.0.1 or 192.168.1.1. When you first get there, you will have to go through a starting guide for the router, choosing admin passwords and set up your wireless network. Here you must choose the same SSID and password that you chose for the 2nd router that we just configured.

Step 2b: Configure DHCP Settings
When you are done with the starting guide and you at the router settings, there is one thing that we need to do on the first router. That is to change the DHCP server settings to not interfere with the 2nd router. Many routers have DHCP configured to start already at the .2 IP address. This is something that we want to change.

Under your DHCP Server settings, which can be found under LAN > DHCP Server on my Asus RT-AC68U router, you need to change the IP Pool Starting Address. I have mine set at 192.168.1.100. This means that any device that connects to my network will have an IP address that is higher than .100. The max for networks is .254, so technically, I can have 154 devices in my network that is using DHCP. However, I also have a lot of other devices in my network with static IP addresses that are below .100.

If you are someone that doesn’t need static IP addresses, I suggest that you have this set on .10 so that you have a few reserved IP addresses if something would come up. It doesn’t affect the performance at all so it doesn’t matter. You just don’t want it to be .2, that’s the main goal.

Step 3: Connecting the 2nd Router to the 1st Router
Now that both the routers have been configured, there is only one small thing left and that is to connect them. To do this, you will need an ethernet cable. Depending on how far away these routers will be to each other, the ethernet cable might need to be quite long. Yes, it is possible to do this by connecting them wirelessly, but I highly suggest using a cable as both routers will talk a lot to each other and it’s best with a stable connection then.

Connect the cable to one of the LAN ports on router 1 and then route the cable through the house to the placement of router 2. This next bit is very important and is the biggest reason why people have problems with this solution:

DO NOT CONNECT THE ETHERNET CABLE TO THE WAN-PORT, CONNECT IT TO A LAN-PORT INSTEAD!

connecting the ethernet cable to the WAN-port of the 2nd router will fail and the setup will not work as expected. I’ve had at least three friends calling me about their setup not working and then it’s just a matter of switching port. So, make sure the ethernet cable is connected to a LAN-port on both routers.

Once they are both connected with the cable and they are powered on, you are done. Congratulations, you now have two routers in your home where one is working as an actual router while the other one is working as an access point, extending your WiFi and giving you more ethernet ports in other parts of the house.

If you want, you can go an extra step further to make sure that they do not interfere with others. This is something I highly suggest that you do if you have done all the work to set up everything, as it’s nice to know it works as good as possible.

Making Sure They Don’t Interfere with Each Other
Since you now have two routers that are relatively close to each other, you need to make sure that they do not interfere with each other. What do I mean with that? You see, when a router is putting out WiFi, it does so in a channel. If both routers are using the same channel to put out WiFi signals, they will interfere and disrupt each other. So, you want to make sure that they use different channels.

A channel is a certain frequency. As you may know, radio comes in at a special frequency, and if you want to change the radio channel, you change the frequency. But you may also have heard that two radio stations interfere with each other, if you are in the middle of two cities, or if you are using an FM Transmitter, for example. It’s the same for routers.

In your router settings, you can change the channel on your WiFi signal. However, if you live in an apartment, you most likely have neighbors around you that also have their routers and you don’t want them to interfere with you either. To solve this, there is a program that you can download for free called SSIDer that can help you choose the best channel for your WiFi.

The problem with SSIDer is that it can be complicated at startup, with a lot of graphs and numbers. MetaGeek, a fantastic company that is creating WiFi solutions for companies and professionals, have made a guide on how to use SSIDer and how you can find the best channel for your situation. Check it out down below.

Easier Alternatives
As always, there are other options to extend the WiFi. The latest technology and the best thing that is currently on the market is a Mesh WiFi system. This is when several routers are creating a “net” with WiFi. You can have two or three routers in your home and they all talk to each other to improve your WiFi and making sure that you have a stable network at home.

But nowadays, it doesn’t have to be routers either as many companies have released mesh-packages. An example of this is the Google Mesh Network, which you can find on Amazon. It is a product with three smaller routers, called nodes, that work together to build a mesh system. One of them is the main router that is connected to the network while the others are extending the WiFi connection further.

The biggest advantage with mesh systems instead of connecting routers together the way we have done is that everything is wireless, and the products are made to be wireless all the time, without ever needing a cable. This means that they will communicate on one channel (frequency) and send out WiFi signals on another, which doesn’t interfere with each other. They also work better if you would go from one room to another, as everything is seamlessly connected.

If you would like to know more about mesh systems and why it’s the big buzzword in WiFi today, you should check out How-To-Geek’s guide on mesh systems, as they have made a great explanation of it.

You can of course just get a range extender as well but as they tend to perform bad, losing a lot of speed and often lose signal as well, the mesh system is much more preferred, as well as connecting two routers as we did in this guide
iPhone!

I now have my first iPhone courtesy of the company.. (course the company is way behind and it’s an iPhone 7 while 11’s are being sold in stores)
Not liking a few things already, but i’m sure i’ll get used to it.
First off.. just wanting to add my own notification sounds.. Have to follow this process:

  • install iTunes on PC (thats even a silly thing – they moved it to the microsoft store, and MS won’t install anything from the store if the device isn’t registered, and you cant register without signing into the device with your MS account.. just stupid. It’s my company laptop, so i’m not going to sign in with my MS account. Found a spot to grab older versions direct download: https://discussions.apple.com/docs/DOC-6562#versions)
  • drag and drop mp3 onto song list in itunes
  • select song, select file->convert->ACC
  • right click on header line in song list and include Kind so that you can now see the difference between the 2 identically named songs.
  • Drag and drop the ACC one to your desktop
  • Rename the extension to be m4r instead of the m4a.
  • In iTunes, switch to the Tones folder.
  • Drag and drop the m4r file into the tones folder.

Done. Thanks to https://www.howtogeek.com/248489/how-to-add-custom-ringtones-to-your-iphone/

Also.. they haven’t yet enabled simple stuff like have the weather shown on your lock screen! Oh, apparently recently they did add that – but only for Do Not Disturb settings, so it only appears briefly, after you leave your do not disturb period. So silly.

Also, homescreen icons must be locked into a grid which automatically compresses to top left.  Should be able to place anywhere on the screen – with maybe the grid locking, but no compression to the top. Saw there is an app out there that lets you customize this better.. we’ll see if i bother.

I am liking the mail app, and how it handles multiple accounts, and choosing the mailboxes to display..

Dislike the way to switch / close apps.. it’s tedious to ‘hard swipe’ from the left, half way on the screen.

I’m sure i’ll add some more bitching / tips below over time..

Linux Mint

laptop crashed after what i think was an update from microsoft that went wrong.. one of the upgrades to windows 10, or subsequent updates..
in any case, my HP envy would not boot up anymore. Wouldn’t restore.. I even took the drive out, ran chkdisk on it, fixed a whole lot of issues.. but no go.

so.. I took the files i needed off of it.. and decided to start fresh with linux Mint.

– for some of the things above, i had to order a nifty gadget that allowed me to hook up a drive to my other computer just as if it was an external drive.
– i also needed a SD card that could hold at least 1.8 GB to hold the ‘live boot’ for mint.
– i used my other computer to boot up on that sd card, and have it install onto the ‘external hard drive’.
– i then put the drive back into the Envy.. tweaked the BIOS to allow for ‘legacy support’ for boot up.. and voila, i’m now running Mint on it

One of my first few learnings (or refreshers really, as i did use unix a long time ago).. was figuring out some installs and little details…getting my printer to work, as well as it’s scanning function.
Then i also wanted to create an image of an SD car i had, to burn onto another sd card.
after a couple failed attempts with gDiskDump, i decided to just learn the underlying linux commands..using “dd”
(the attempts did get me to learn some install commands.. ie.
sudo apt-get install python-setuptools (installed it great, but turned out it no longer had the easy install i was looking for to get a program that seemed to be stopping gdiskdump from working..)
sudo apt install python-pip (not sure if it was already there, but installed pip)
pip install pynotify (installed the missing item.. so gdiskdump would work.. though still got errors when it tried to create the images).

This site helped me: https://www.cyberciti.biz/faq/unix-linux-dd-create-make-disk-image-commands/

with the added trick of unmounting the sd card partitions so that i could copy the entire device rather than a partition. (maybe i should have tried gDiskdump after the unmount come to think of it)

– figured out the device name using df (or hovering over the item in the file explorer)

sudo umount /dev/mmcblk0p2
sudo umount /dev/mmcblk0p1

-next step took about 5 minutes to create the ~8GB image (zipped to about 3.5)
sudo dd if=/dev/mmcblk0 | gzip -c > ./pifull.img.gz

–next step took about 20 minutes to write the image
sudo gunzip -c ./pifull.img.gz | sudo dd of=/dev/mmcblk0

I’m sure i’ll be placing lots of things here for my notes..

windows 10 items

turning off defender:

You may disable Windows Defender in the Windows Registry as well. Basically, it is the same setting that gets written to it when you disable the application in the Group Policy Editor.

Tap on the Windows-key to open the Start Menu.
Type regedit.exe and hit enter.
Confirm the UAC prompt to continue.
Navigate to the following key: HKEY_LOCAL_MACHINE\SOFTWARE\Policies\Microsoft\Windows Defender
If you see the preference DisableAntiSpyware on the right double-click on it and set it to 1 to disable Windows Defender.
If the preference does not exist, right-click on Windows Defender and select New > Dword (32-bit) Value, and name it DisableAntiSpyware.
To restore Windows Defender at a later point in time, delete the key or set its value to 0.

Android application reaches milestone!

So after almost exactly a year, my android app has reached a pretty big milestone. Note that it wasn’t a year of effort..not even close.. I didn’t touch it for about 4 months.. and even when I am actively coding, I’m lucky to get a couple hours (between 9pm and midnight) where I don’t get interrupted..

Anyway, the milestone reached is that I have all communications built. I still have lots of features to add, and lots of functionality in the app itself..and a TON of making it look good..  but I think the main complexities are taken care of now.

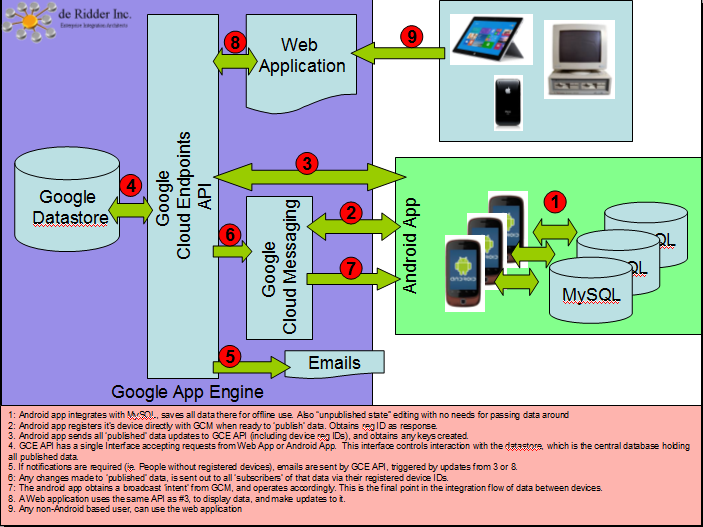
I recall when I first started, I was trying to find a good high level architecture of how an android application would work, together with GAE (Google App Engine), GCM (Google Cloud Messaging), GCE (Google Cloud Endpoints), the Google Datastore, and the MySQL database.  I drew a few versions of the architecture early on, after some reading  (being an enterprise architect, I like understanding the big picture before I dive in), and it turns out they were pretty accurate.  But I’ve now drawn the pic, in case anyone else looking happens to find this little pic in the interwebs..

Of course there are many ways to skin this.. but this might be a pretty good general way, assuming you want offline data, but also want to share data between other devices and at the same time minimize the traffic since using Google’s platform is only free if you stay below certain quotas.

So here is the pic.  It turns out that to code an app that does this, really means you are coding about 3 different applications. The Android App itself, the GCE API, and the Web App if you want users who aren’t on Android.

GAE Architecture for Android app

Version Control and Bug tracking

Finally decided to worry about messing up all the code i’ve made for my little app ..Now that I’ve got the majority of the MAJOR functions done.

Was looking into various options for it, but then discovered that GIT is included in Eclipse. So that’s cool. Followed a couple simple steps from http://www.vogella.com/tutorials/EclipseGit/article.html#github to set up my project in GIT, and voila, I now have version control.
Just had to overcome one slip – didn’t realize it would move my code – thought it would just add the versioning to it. But thats fine, I cleaned up where it was being moved to, and sorted that out.
I’ve now added the GIT repositories to my backup process.. so I also have backups of it all.
moving forward, I have much better tracking of changes made to the code, so I can revert back should I screw something up!

On top of that.. I’ve been looking into a useful bug tracking tool.. I have a million TODO’s in eclipse.. and those will be great to go over.. but I also have a note book of general ideas and enhancements.. these would be better to track in a tool. there are lots out there.. currently looking at Axosoft…

External access to my home PC

So I’ve never bothered to get a static IP address from my ISP.. this makes it a bit of a challenge when wanting to access files from work, that are sitting on my home pc.

However.. I do have a website hosted elsewhere..
So what I have done (actually for about 15 years now).. is run a little scheduled task on my home PC, that obtains it’s IP address, creates a little web page, and FTPs that page to the website. Then, I can access the website and link to my home PC. The odd time I want to make a slight change to this, I have to relearn what I’ve done.. So I’m writing it up here finally…in case I actually remember to check here 😉

Its changed a little over the years.. pending my ISP, and changes to how I connect to them. These days I have a router connected to them.. So my home PC never actually gets the external IP address assigned.

SO.. it takes a mapping in my router to forward the requests to the static LAN IP, and it also take a little trick to find out what the external IP address is..

Here is the script I use to do that:

set "header=^<head^>^<body^>^<a href=http://"
set "footer=^>my place^</a^> update at: %DATE% %TIME% ^</body^>^</head^>"

FOR /F "tokens=1 delims=" %%A in ('call wget -q -O - http://myexternalip.com/raw') do SET ip=%%A

echo.%header%%ip%%footer% > linkhome.html

FTP -v -i -s:ftpscript.txt

The website I use has changed a couple times (they seem to come and go).. but this one is working great right now (myexternalip.com).
I also use wget, which is just a handy thing to obtain websites as a file for parsing.

The only other thing is serving it up. For this, I use Apache. I set it up to have an alias to the folder I want to allow access to, and enforce authentication based on a specific local user.

The funny thing is that trying to access it within my LAN (ie. from my other PC), won’t work using the external IP address.. (it will if I just use the local machine name / lan ip address).. but it works fine when coming externally.

website admin pains

so it was ages since the last time I administered one of my sites.. and of course i couldn’t find passwords, etc.

i was using joomla as the CMS.. had to even find out that ‘admin’ was the default administrator user

found good tips for setting the password through a backdoor at:
http://www.dart-creations.com/joomla/joomla-tips-and-tricks/25-forgot-your-super-administrator-password.html

for that even though, i had to find the database name / username and password for that.
with go daddy being the host, they have a mySQL tool, and then from the list of databases, i could choose ‘details’, and within that, it gave me the username, and a place to reset the password.

after doing that, i got into the database, and altered the admin password for joomla.

the login worked, but then an error from joomla trying to access the database.
turns out it needs the right database password stored in the configuration.php file on the root of the website.

So i looked at that using go daddy’s file manager, and sure enough in there i found the spot, and could see what the old password was for the database.
i updated that file to the new password..

gave the site a while to refresh it’s cache.. and then everything worked..

i’ll likely need all the above again.

XBMC and Raspberry Pi

So while looking around for alternatives to Rogers Cable and Bell TV, and after having tried out the Satellite dish hacks awhile back, a friend pointed me to XBMC (X Box Media Center)

First, i tried it out on my cell phone. I downloaded it off the Google play store.
I looked up a couple instructions for what add-ons to get, and how to deal with add ons for XBMC.
The first one I went with was XBMC Hub.
Within a few minutes I was watching a movie on my Cell phone, streamed from some unknown source through the graces of peer to peer streaming.

I struggled with some ideas as to how to get this on my TV. Samsung doesn’t open up their TVs to just any apps.. and there are none for free streaming.
I could just use the output from my laptop running XBMC, and plug that into the TV.. but that means plugging in a laptop everytime.
The TV accesses network sources and media centers running remotely.. but only as a file share – not for streaming (ie. no files exist on the cell phone or laptop when watching a streamed movie). So that won’t work either.
There is also Miracast.. .Where my tablet or cell phone could have it’s screen being streamed to the TV as a mirrored copy.. But my TV doesn’t have Miracast so I’d have to buy a Dongle for that.. and I’m not a fan of having to keep the device on the whole time (it’s a true mirror, so you can’t even let the device sleep)
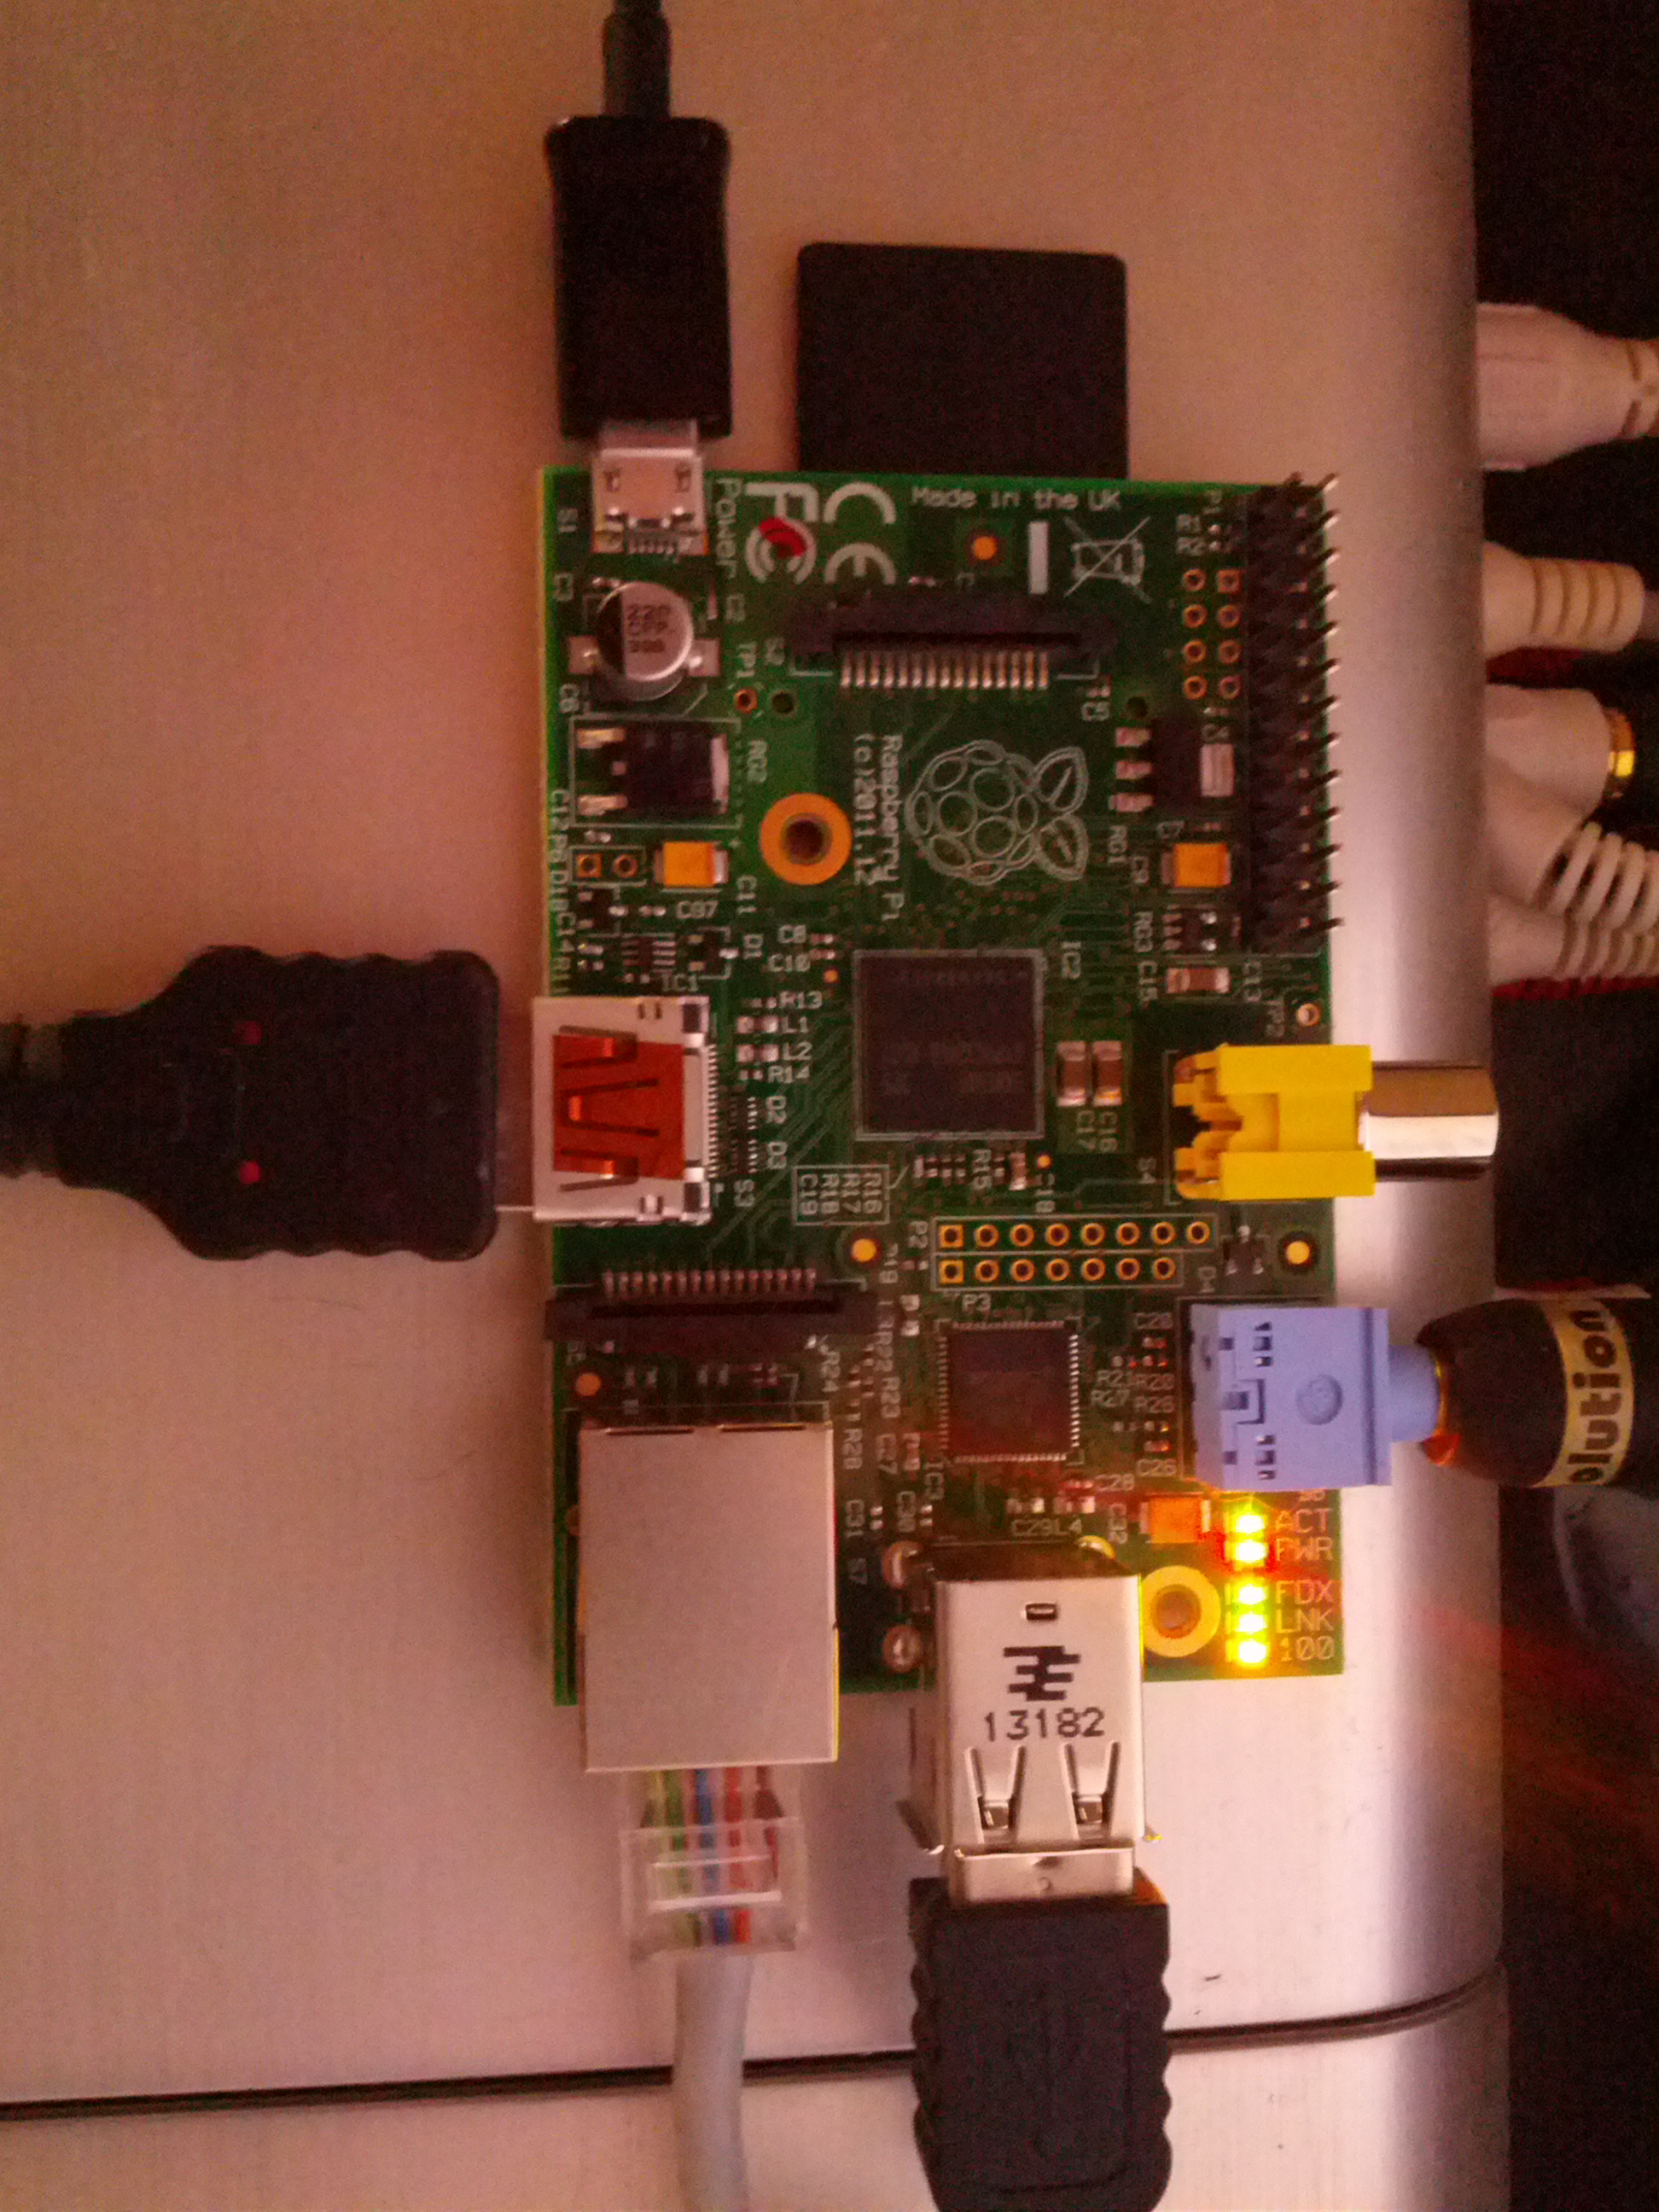
Then I happened upon Raspberry Pi devices. It’s a mini computer really, for around 45$. It has basically nothing but a processor, ethernet cable, HDMI output, micro USB power input, 2 USB ports, SD card slot that it boots from, analogue sound output, and RCA video out.
The more I looked into this little thing, the more interesting gadgets and things people made with it.
But the one I was most interested in, was using the operating system based on Linux, called Raspbmc. Its basically an operating system dedicated to XBMC.
So hook the TV’s USB cord to the power input, the HDMI from the Pi to the TV, and an ethernet cable to the Pi. The TV can then run off the XBMC program, and you can stream direct to the TV though HDMI.

I decided to go out and grab one, and just see if I’d be able to do it without buying anything else.

I knew I didn’t have any 4GB SD cards though.. and I decided to spring an extra 5$ on top of the cost of buying one, to have the place pre load the card with NOOBS.
NOOBS is a simple boot up program that allows you to choose the OS you want to install.. and allows for easy replacement later if you wish.

So I came home.. First challenge – powering the Pi. I hadn’t realized it was a micro USB.. I had a larger version. But then I found that my cell phone charger had the same size (I have a Samsung Google Nexus).
I had a short HDMI to plug into the TV.. And I already had an Ethernet cable hooked up to my TV – i just swapped it into the pi.
I also had an audio plug i used for hooking up my sterio to my Ipod deck. I used this cable and plugged it into the analogue sound output on the Pi.

I decided to plug the power into the wall using the charger, rather then to the TV via USB to start.. just incase.

The boot up OS install option came up. However, I couldn’t control it yet. The TV remote wouldn’t work.. yet.. (I had read about HDMI CEC). I figured the OS had to be up and running first for that.

So hard as it is to believe, I was almost stuck there. I actually have no USB keyboards or mice. the last time I bought one of those it was still PC2 plugs!
As luck would have it, after racking my brains for awhile, I thought to check my client’s laptop bag they provided me (they often do, but I just use my own backpack). And low and behold, they provided me with a USB mouse. Nice!

So I plugged that into the USB port, and bingo, I was able to select Raspbmc as my OS to install.
I literally only needed the mouse for 2 clicks.

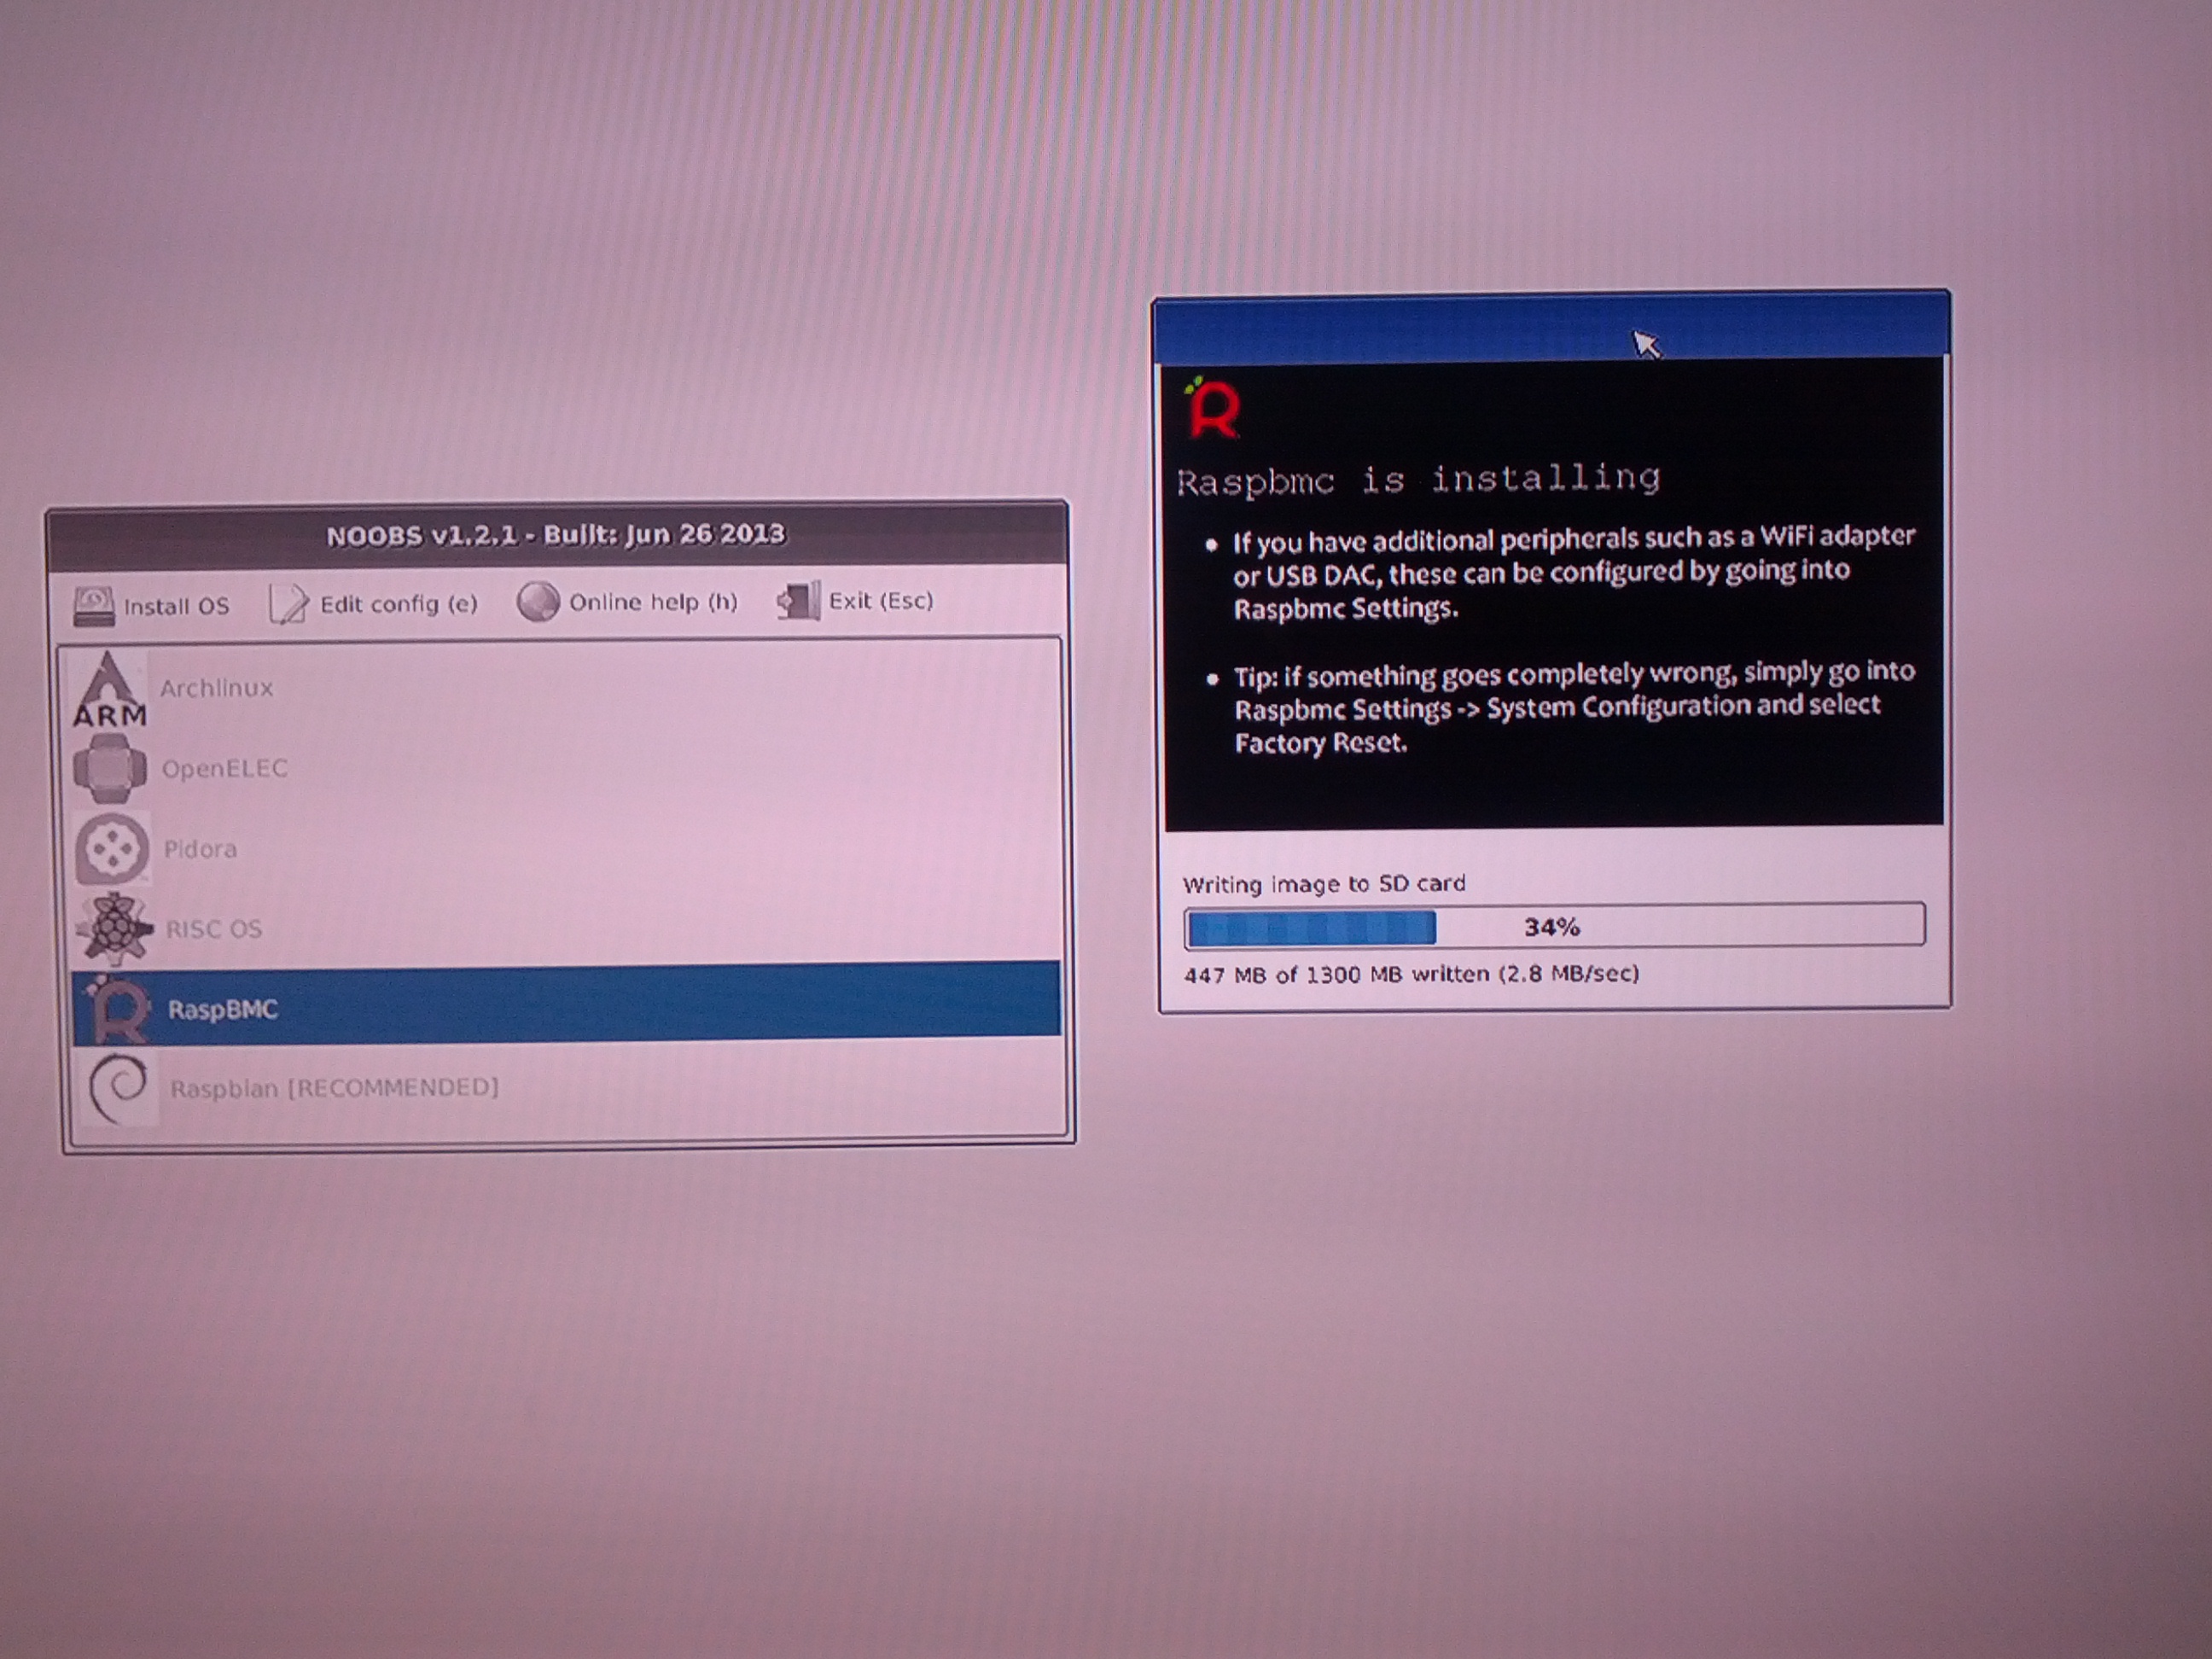
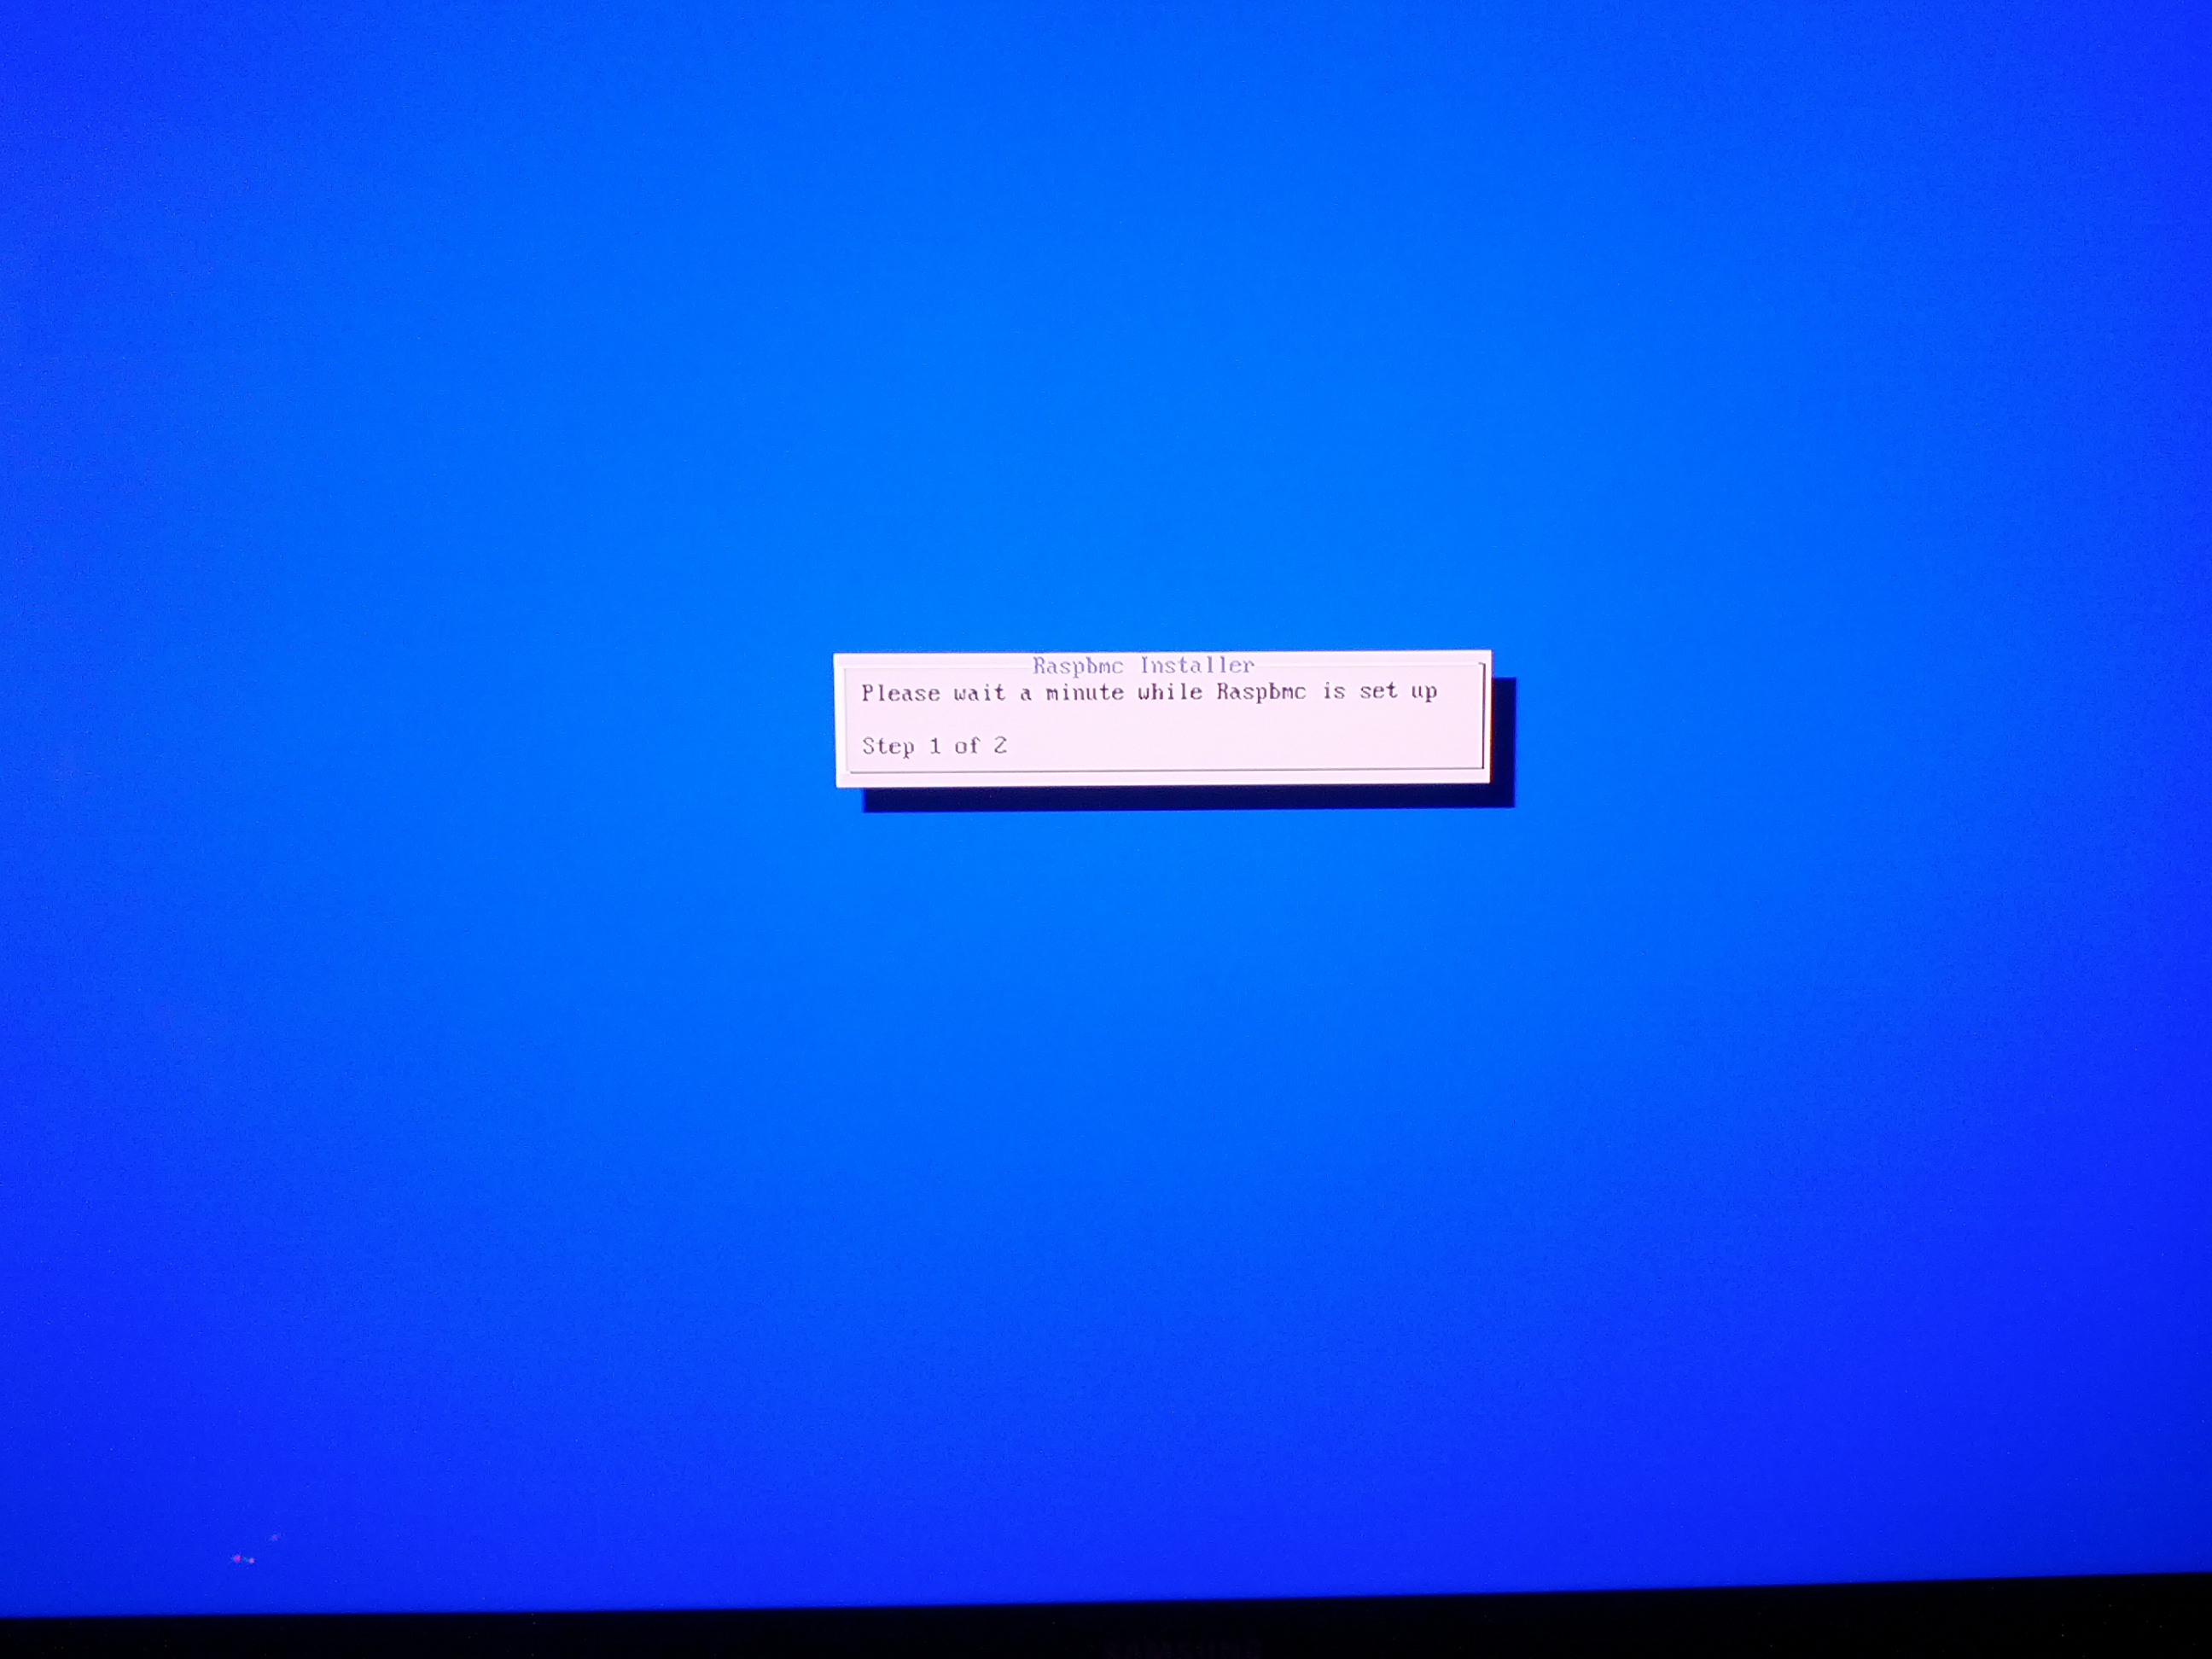
It ran through a ton of downloading, extracting, installing, configuring.. I started to sweat thinking it was stuck in a reboot loop at one point. It didn’t help that the status bar wasn’t aligned right, so I couldn’t even see what it was actually doing – if it was any different from the last time it rebooted.
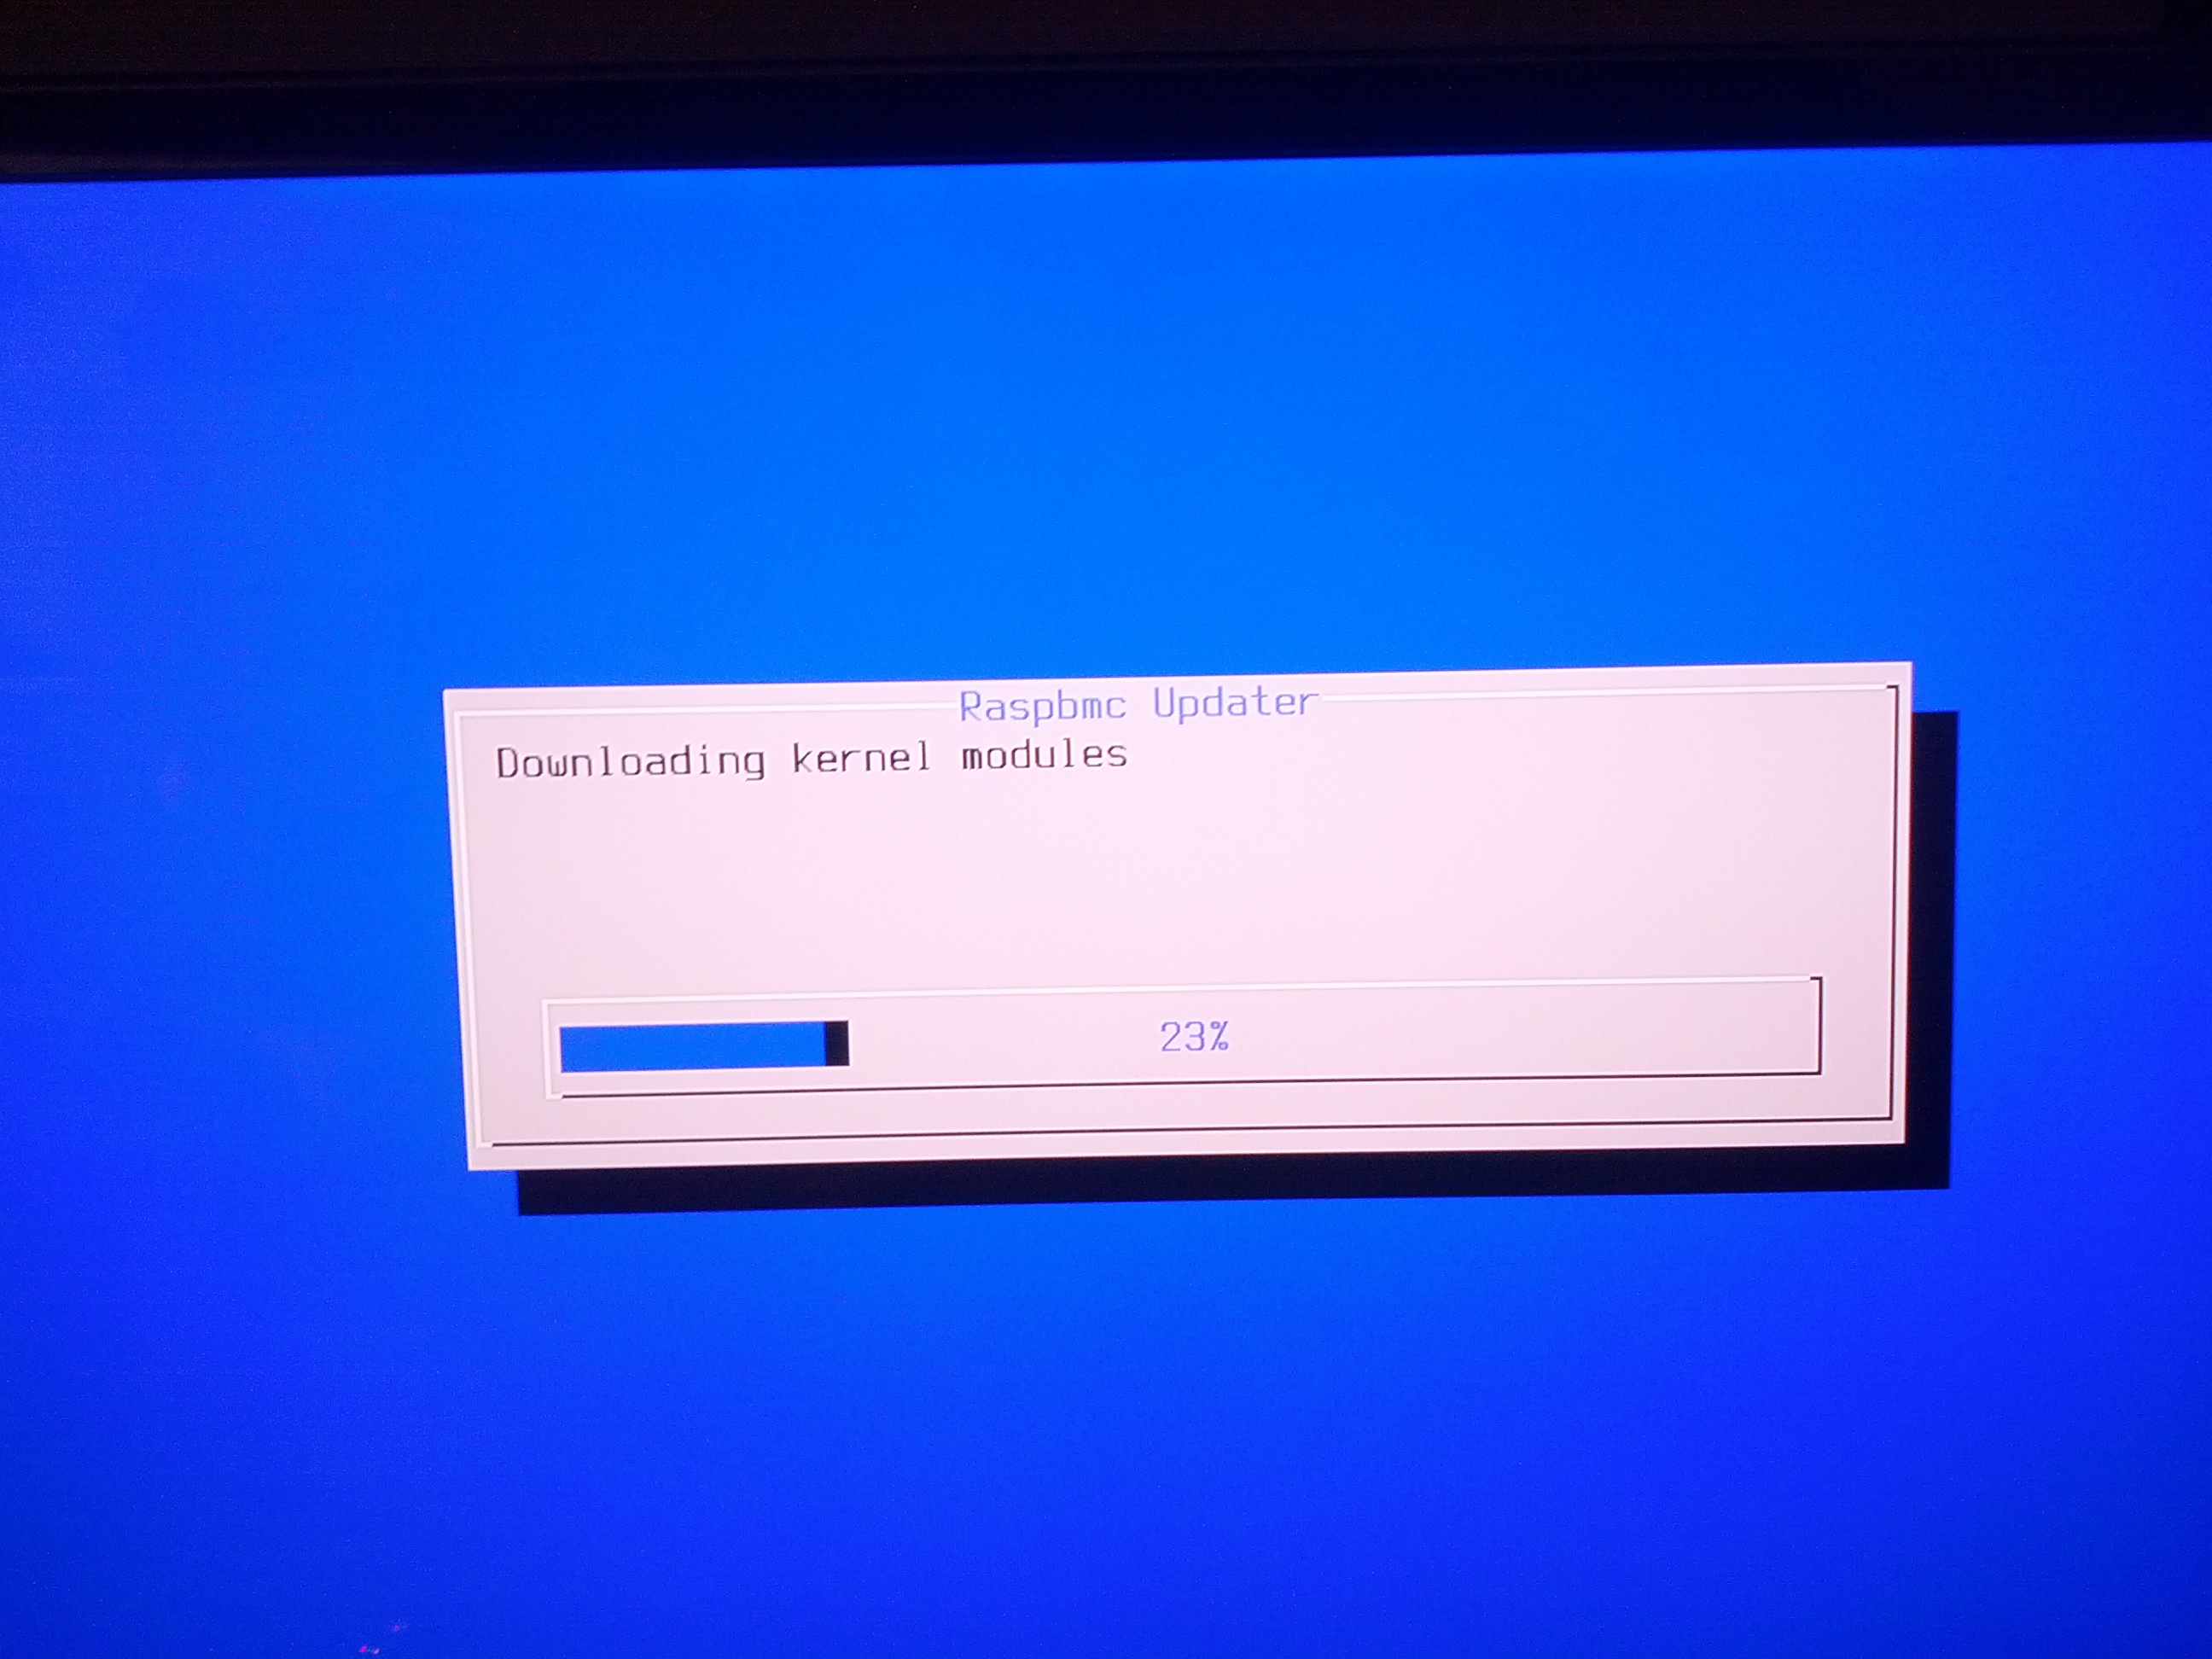
But I just let it go. had lots of patience. Some of the screens I saw:

and here is the common one during the last while, with the status bar in the upper right:

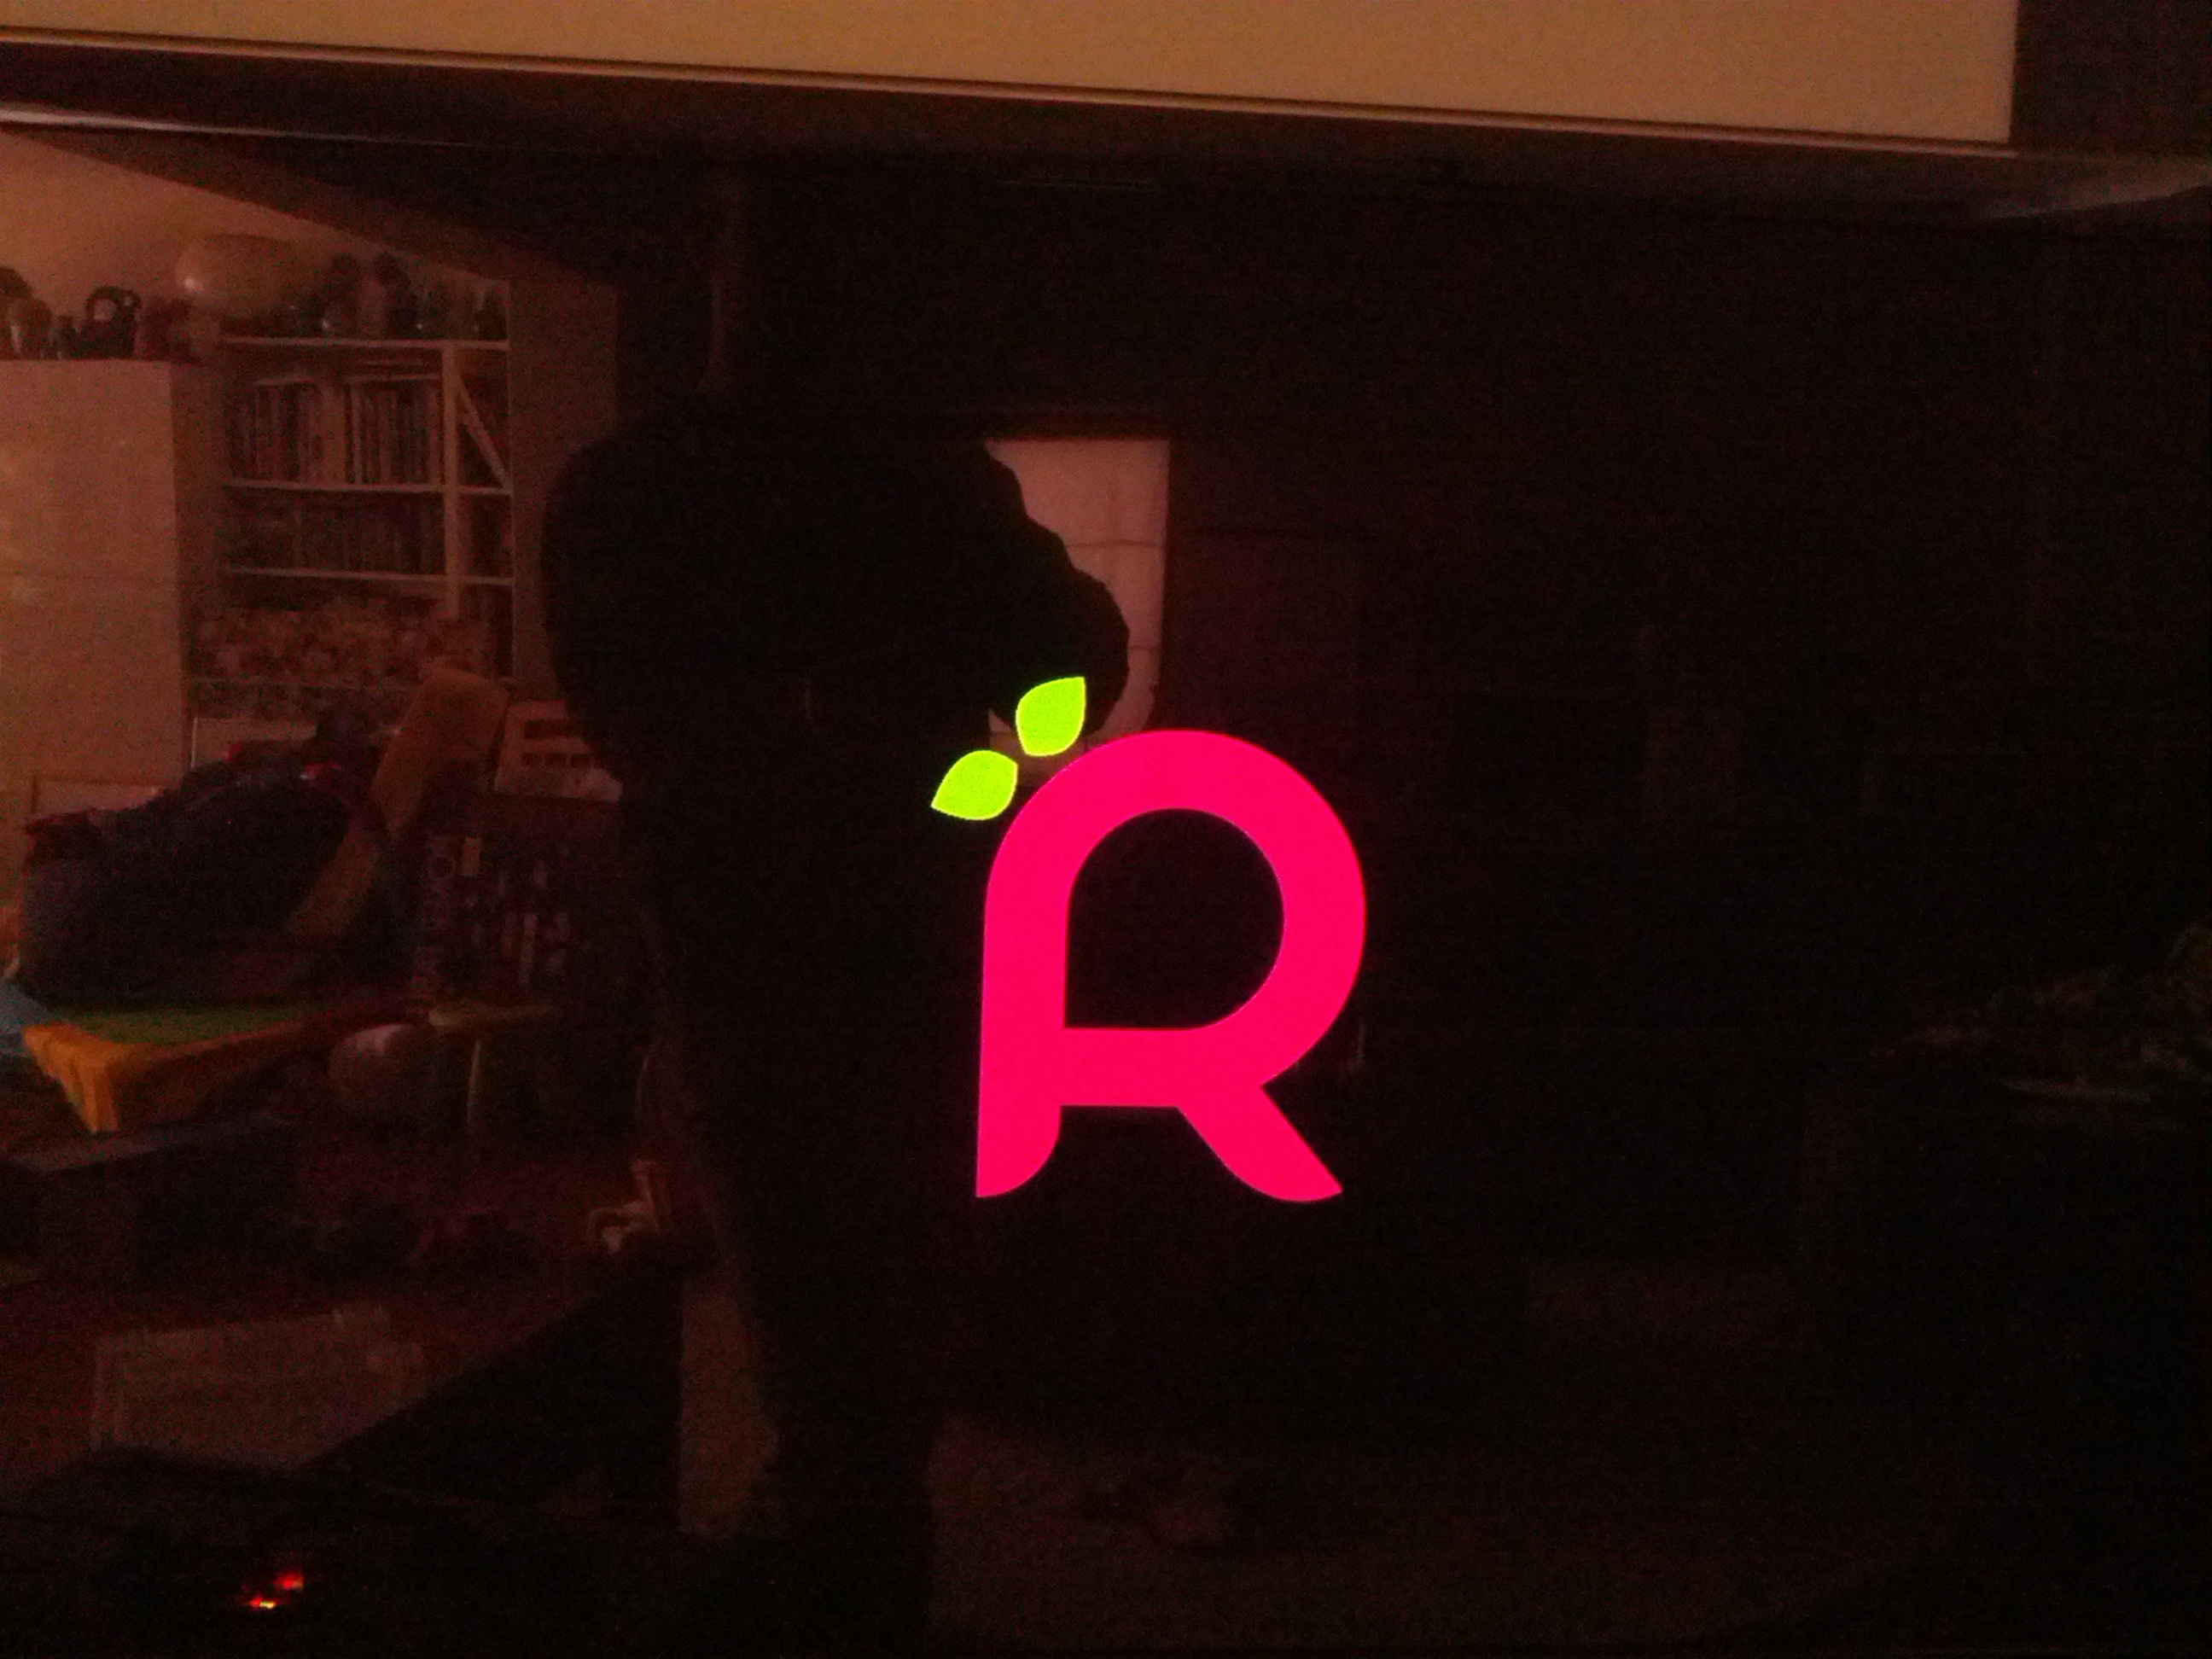
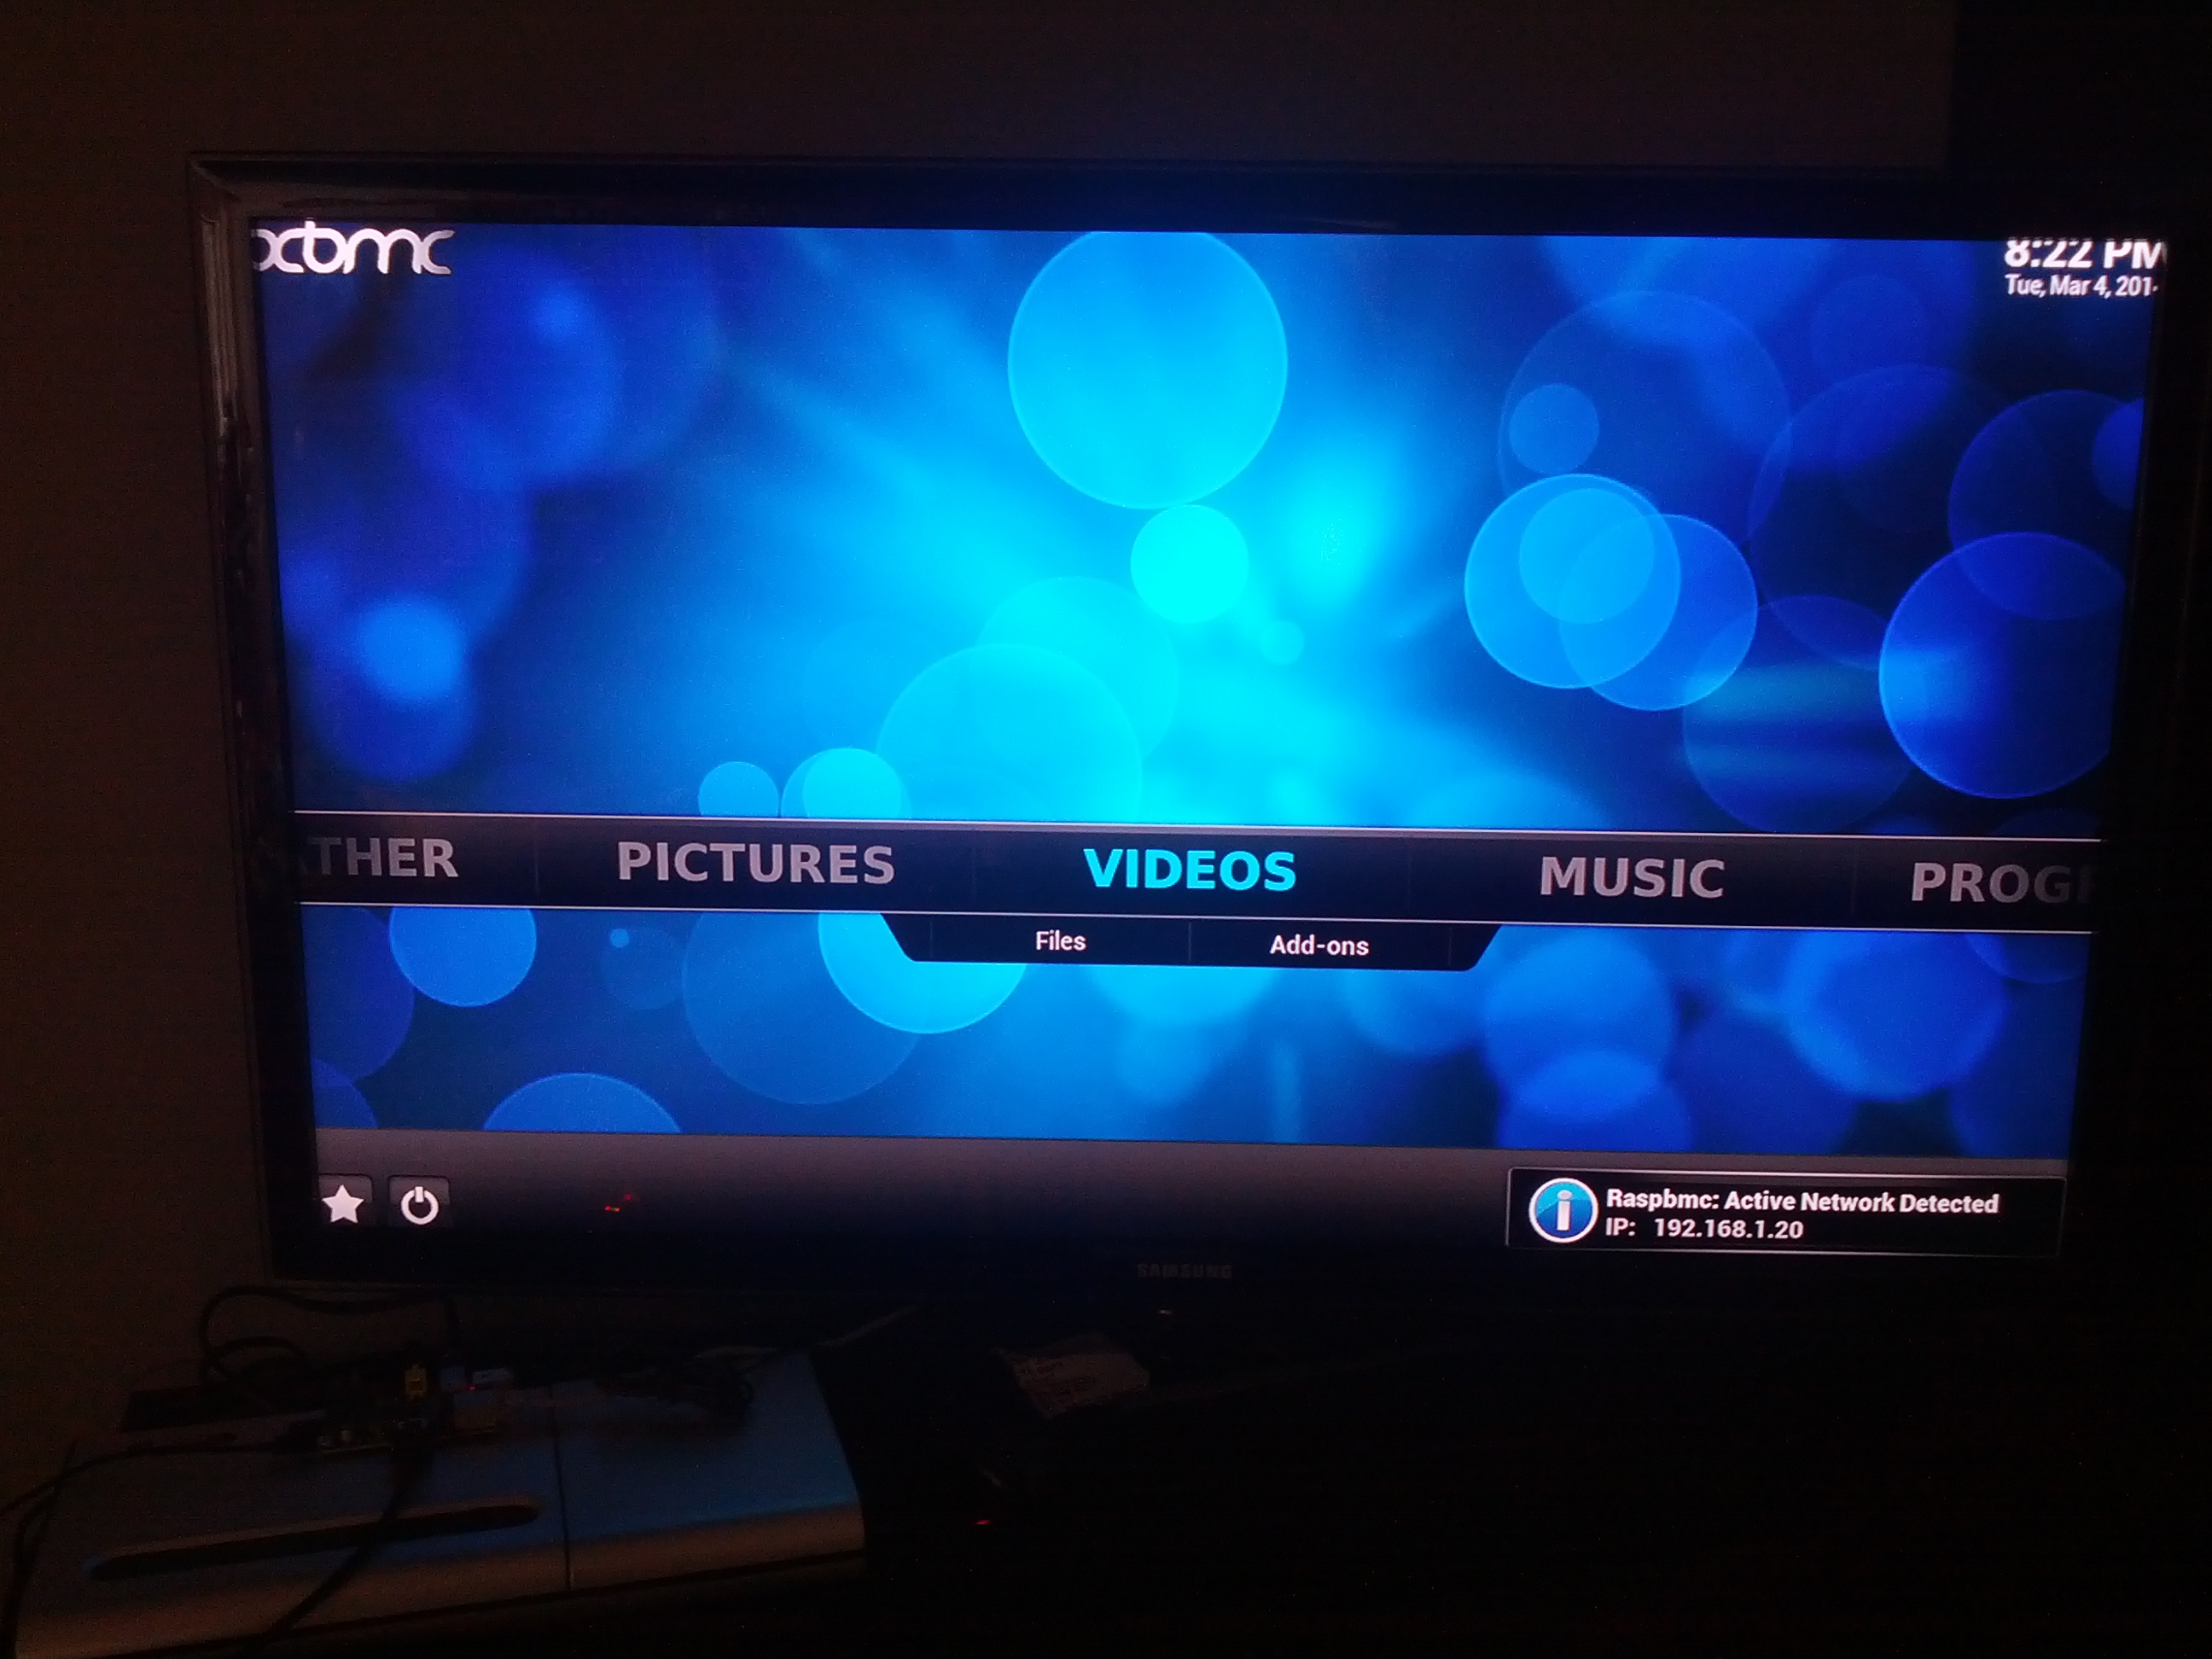
But it did eventually reboot with this:

From that point, my TV remote worked to control the Raspberry Pi XBMC user interface. Sweet. That is definitely one good thing about HDMI. They added a wire to send info back to the source. And Samsung thankfully use it with their Anynet+ to send remote control commands.
I then looked up the official XBMC android app for remote control. Quickly got that working as well so my cell phone was controlling it over the LAN. made for much easier typing of sources for the add ons.

Everything was working pretty much perfect.. added the NAV-X program as well.. It has some nice HD movies available.
Found out that even hitting ‘shut down system’ on the XBMC actually turned the TV off too.

Turning it back on doesn’t seem so simple using a wall plug. had to unplug and replug. Likely this will be better once I switch to the TV USB as a power supply.

Another cool thing about the cell phone remote app, is that it also sends texts and call display messages to your tv, so you can see them without looking away.

One downfall I am still looking into – the analogue audio out, which goes to my ancient (but great sounding) Bose Lifestyle system, seems to be extremely low sound for the dialogue, with the sound effects tracks a bit louder. So I can’t use it yet.

Another, is how I will switch to my projector when I want. A quick solution would be an HDMI switch I suppose.. I’ll have to look into that.
I’ll add some of the sites that helped me out with the setup soon..

filename field reference in Word docs

It’s quite common to make the title of a document, the same of the filename. A little headache arrives when that filename includes a version number, and the title is supposed to have it as well (for printouts).
Rather then having to update it everytime you save as a new version, I use the filename fields as the title, so it’s “automatic”.
However, this still needs a right click on the field and ‘update’, or, click on the field and hit F9.
Printing the file will also automatically update this field.
But if you really want it updated automatically, apparently MS has the suggestion for a macro:
http://support.microsoft.com/kb/832897